
Professional vs DIY Garage Floor Coating: Durability Comparison
Table of Contents
Professional vs DIY Garage Floor Coating: The Durability Reality
Concrete Surface Preparation Techniques That Determine Longevity
Polyaspartic vs Epoxy Durability: Which Lasts Longer
How Long Does Garage Floor Epoxy Last: Professional Installation vs DIY
DIY Kits vs Professional-Grade Materials: What You're Actually Getting
Concrete Slab Condition Assessment Checklist
Material Grade and Application Differences
Warranty Coverage and Long-Term Protection
Making Your Decision: When DIY Makes Sense and When Professional Installation Pays Off
Long-Term Cost-Per-Year Analysis
When DIY Makes Sense
When Professional Installation Pays Off
The Honest Assessment
Frequently Asked Questions
Last Updated: September 24, 2026
Professional vs DIY Garage Floor Coating: The Durability Reality
When homeowners in Madison consider upgrading their garage floors, they face a critical choice: attempt a DIY coating kit or hire professional installation. The decision hinges on garage floor coating durability. A coating that fails after two years costs far more than professional work that lasts a decade. The real difference between a garage floor that looks great for years and one that peels, chips, and cracks within months comes down to preparation technique, material grade, and installation precision.
Professional-grade epoxy and polyaspartic coatings offer superior durability when applied correctly. Most DIY kits deliver less protection before showing significant wear. This durability gap is shaped by concrete substrate preparation, moisture management, and coating thickness.
Concrete Surface Preparation Techniques That Determine Longevity
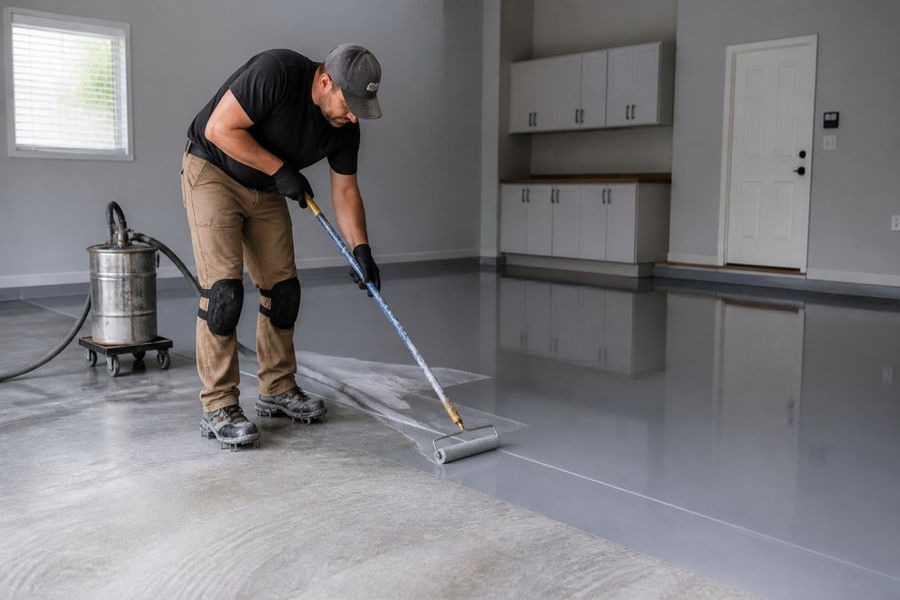
The single biggest predictor of coating longevity is substrate preparation. A coating can only bond as well as the substrate allows. Poor preparation guarantees early failure, regardless of material quality.
Professional installation uses mechanical preparation methods like diamond grinding or acid etching to open the concrete's pores. Diamond grinding removes the top layer of concrete, eliminating contaminants and creating a surface with proper porosity for adhesion. Both methods require time and equipment most homeowners don't have.
DIY kits typically assume you'll clean the concrete with a degreaser and pressure washer. This removes surface dirt but leaves the concrete sealed and unprepared for proper adhesion. The coating sits on top rather than bonding into the substrate, causing it to lift and peel within months.
Professional surface preparation is the foundation for garage floor coating durability. It requires assessing concrete slab condition, checking for moisture vapor transmission issues, and choosing preparation methods that match your specific floor's needs.
Polyaspartic vs Epoxy Durability: Which Lasts Longer
Epoxy is a two-part system that cures through chemical reaction. Professional epoxy systems offer significant durability in residential garages. DIY epoxy kits often use thinner application rates and lower-quality resin. Epoxy can yellow under UV exposure and becomes brittle in cold climates, which matters in Mississippi's temperature swings.
How2ToGo
Polyaspartic cures faster and maintains flexibility better than epoxy. It resists UV degradation, stays pliable in cold weather, and handles thermal expansion without cracking. Professional polyaspartic coatings offer long-lasting durability, but materials are more expensive than epoxy, which is why it's rarely found in DIY kits.
Professional polyaspartic offers excellent performance, as does professional epoxy, both of which generally outperform DIY epoxy. Application thickness and substrate preparation matter more than material chemistry alone.
How Long Does Garage Floor Epoxy Last: Professional Installation vs DIY
Professional epoxy systems in residential garages offer significant durability with proper maintenance. DIY epoxy kits typically show noticeable peeling or chipping sooner.
Professional installation applies multiple coats at proper thickness: primer for adhesion, base coat for chemical and impact resistance, and top coat for UV protection and slip resistance. DIY kits often combine these into a single application, sacrificing durability for simplicity.
Moisture is the silent killer of garage floor coatings. Concrete wicks moisture from the ground through moisture vapor transmission. Professional installers test for moisture levels before coating and install vapor barriers when needed. Most DIY applications skip this step, causing delamination within a year or two.
Heavy traffic accelerates failure through thermal cycling and mechanical wear. Professional coatings handle this; DIY kits fail quickly under heavy use.
DIY Kits vs Professional-Grade Materials: What You're Actually Getting
The price difference between a DIY kit and professional installation reflects real differences in material quality, application thickness, and durability. Before comparing materials, assess whether your concrete slab is a candidate for DIY coating. A slab with moisture problems, existing coating failure, or structural damage will reject any DIY kit.
Concrete Slab Condition Assessment Checklist
Before choosing between DIY and professional, evaluate your concrete:
Moisture and Vapor Transmission:
Perform the calcium chloride test (ASTM F1869) or moisture meter test before any coating. If moisture vapor transmission exceeds 3 lbs/1000 sq ft/24 hours, DIY epoxy is likely to fail.
Check for efflorescence (white chalky residue) or dark stains, which indicate active moisture migration requiring professional-grade vapor barriers that DIY kits don't include.
Existing Coating or Sealant:
If your concrete has been sealed, stained, or previously coated, the old coating must be completely removed. DIY surface preparation will not remove old coatings; professional diamond grinding is required. Skipping this step guarantees DIY failure.
Test adhesion by scratching the concrete with a coin. If material flakes away, old coating is present and must be removed mechanically.
Structural Integrity:
Look for cracks wider than 1/8 inch, which indicate structural movement requiring concrete repair before coating. Hairline cracks can be sealed during professional prep.
Check for spalling or pitting, which require concrete repair or grinding. DIY kits assume a smooth substrate.
Press on the concrete with a screwdriver. If it dents or crumbles, the concrete is too weak to hold coating adhesion.
Contamination:
Identify oil stains, rust marks, or chemical residue. A pressure washer alone won't eliminate deep contamination. Professional degreasers and grinding remove contaminants; DIY cleaning often leaves residue that prevents adhesion.
Test for loose concrete dust by sweeping vigorously. If dust clouds appear, professional-grade primer is required.
If your assessment reveals moisture issues, existing coatings, structural cracks, or deep contamination, professional installation is not optional, it's necessary. DIY kits will fail on compromised substrates. If your concrete passes this checklist (low moisture, no prior coating, no cracks, clean surface), DIY becomes more viable, though preparation skill still matters.
Material Grade and Application Differences
DIY kits like Rust-Oleum RockSolid or Quikrete Epoxy Garage Floor Coating are engineered for ease of application, not maximum durability. Application thickness is typically 2-4 mils with a single coat. These kits often use lower-cost materials and assume minimal surface preparation.
Professional-grade materials are formulated for durability and performance under stress. They use higher-quality resins, better curing agents, and additives that improve adhesion and chemical resistance. Professional systems are applied across multiple coats.
A DIY kit costs $100-300 for supplies and your labor.
Aspect | DIY Kits | Professional Installation |
Material Grade | Consumer-grade resin | Industrial-grade formulation |
Application Thickness | 2-4 mils | 8-15 mils |
Coats Applied | 1-2 coats | 3-4 coats |
Substrate Prep | Basic cleaning | Professional grinding or etching |
Moisture Testing | Typically skipped | Required before application |
Slab Condition Assessment | Not performed | Comprehensive evaluation |
Expected Lifespan | 1-3 years | 7-15 years |
Warranty | Limited or none | Workmanship warranty |
Warranty Coverage and Long-Term Protection
Warranty terms reveal how much confidence manufacturers and installers have in their products. They also clarify what happens when something goes wrong.
Making Your Decision: When DIY Makes Sense and When Professional Installation Pays Off
Long-Term Cost-Per-Year Analysis
The upfront cost comparison between DIY and professional installation is misleading without calculating the cost-per-year over the lifespan of the coating. This is where the financial case for professional installation becomes clear.
DIY Scenario: Repeated Failures
DIY kit cost: $150-300 (materials and supplies)
Expected lifespan: 2-3 years before noticeable peeling or chipping
10-year total cost: $500-1,500 (plus your labor repeated 3-4 times)
Professional Installation Scenario: Single Application
Professional installation cost: $1,500-4,000 (depending on square footage and system choice)
Expected lifespan: 10-15 years with proper maintenance
10-year total cost: $1,500-4,000 (one-time investment)
Key Takeaway Cost-per-year reality: Professional installation amortizes to $100-400/year over 10-15 years. DIY repeated failures cost $50-150/year in materials alone, plus your labor, and you never get a durable finish.
When DIY Makes Sense
Light-use spaces: If your garage is a hobby room, storage area, or workshop with minimal vehicle traffic, a DIY kit might be considered.
When Professional Installation Pays Off
For most homeowners, professional installation delivers better value:
Heavy daily traffic: If your garage sees heavy vehicle traffic or multiple vehicles parked regularly, professional-grade systems are recommended. DIY kits may not hold up under heavy use.
The Honest Assessment
Consider your situation honestly:
How many vehicles use the garage daily?
Will you be in this home for 10+ years?
Do you want to re-coat every 2-3 years or enjoy a durable finish for a decade?
Is aesthetics important, or just basic protection?
Does your concrete pass the slab condition assessment checklist?
Are you comfortable with the cost-per-year math of repeated DIY failures?
These answers guide the decision. For most homeowners in Madison and the surrounding area, professional installation delivers better value when you calculate the true cost of repeated DIY failures and factor in your time. A garage floor that fails prematurely costs far more than professional work that offers long-term durability.
Frequently Asked Questions
What's the most common reason DIY garage floor coatings fail?
Poor concrete surface preparation is the leading cause of DIY coating failure. When homeowners skip or rush mechanical preparation like diamond grinding or acid etching, the coating lacks proper substrate adhesion. This causes peeling, flaking, and hot tire pickup within months. Professional installers perform thorough surface preparation, ensuring the concrete substrate is clean, properly profiled, and ready for optimal coating adhesion and durability.
How long does professional garage floor epoxy last compared to DIY?
Professional epoxy installations offer long-lasting durability with proper maintenance, while DIY kits typically have a shorter lifespan. The difference comes from material quality, application thickness, curing agent strength, and substrate preparation. Professional coatings use high-quality formulations. DIY products often use thinner base coats and top coats, making them vulnerable to delamination and environmental stress.
Does polyaspartic coating really outperform epoxy for durability?
Polyaspartic coatings offer faster cure times and superior UV stability compared to traditional epoxy, making them ideal for high-traffic areas and spaces exposed to sunlight. However, durability depends more on application quality and substrate preparation than coating chemistry alone. Professional polyaspartic installations with proper mechanical preparation and multiple coat layers significantly outperform DIY epoxy. Both can fail if the concrete slab isn't properly assessed and prepared beforehand.
Why does concrete slab condition assessment matter before coating?
Concrete slabs with moisture issues, poor porosity, or structural damage won't hold any coating effectively. Professional installers assess moisture vapor transmission rates and concrete substrate condition before beginning work. DIY applications often skip this step, resulting in coatings that bubble, peel, or delaminate when moisture migrates through the slab. A proper assessment determines whether moisture mitigation or vapor barriers are needed, directly impacting floor longevity and performance.
Get Started Today