
Polyaspartic Floor Coating Installation Timeline
A garage floor can go from stained, dusty concrete to a finished, decorative surface in remarkably little time. Still, a polyaspartic floor coating installation timeline is not just a matter of applying a coating in the morning and parking on it that evening. The visible transformation happens quickly, but the schedule depends on concrete condition, preparation needs, weather, and how soon you need the space back in service.
For many residential garages and smaller commercial spaces, the on-site installation can be completed in one day. That speed is one reason polyaspartic coatings are so appealing. The right result, however, comes from allowing enough time for surface preparation and proper curing rather than simply rushing to the finish line.
What a Typical Installation Day Looks Like
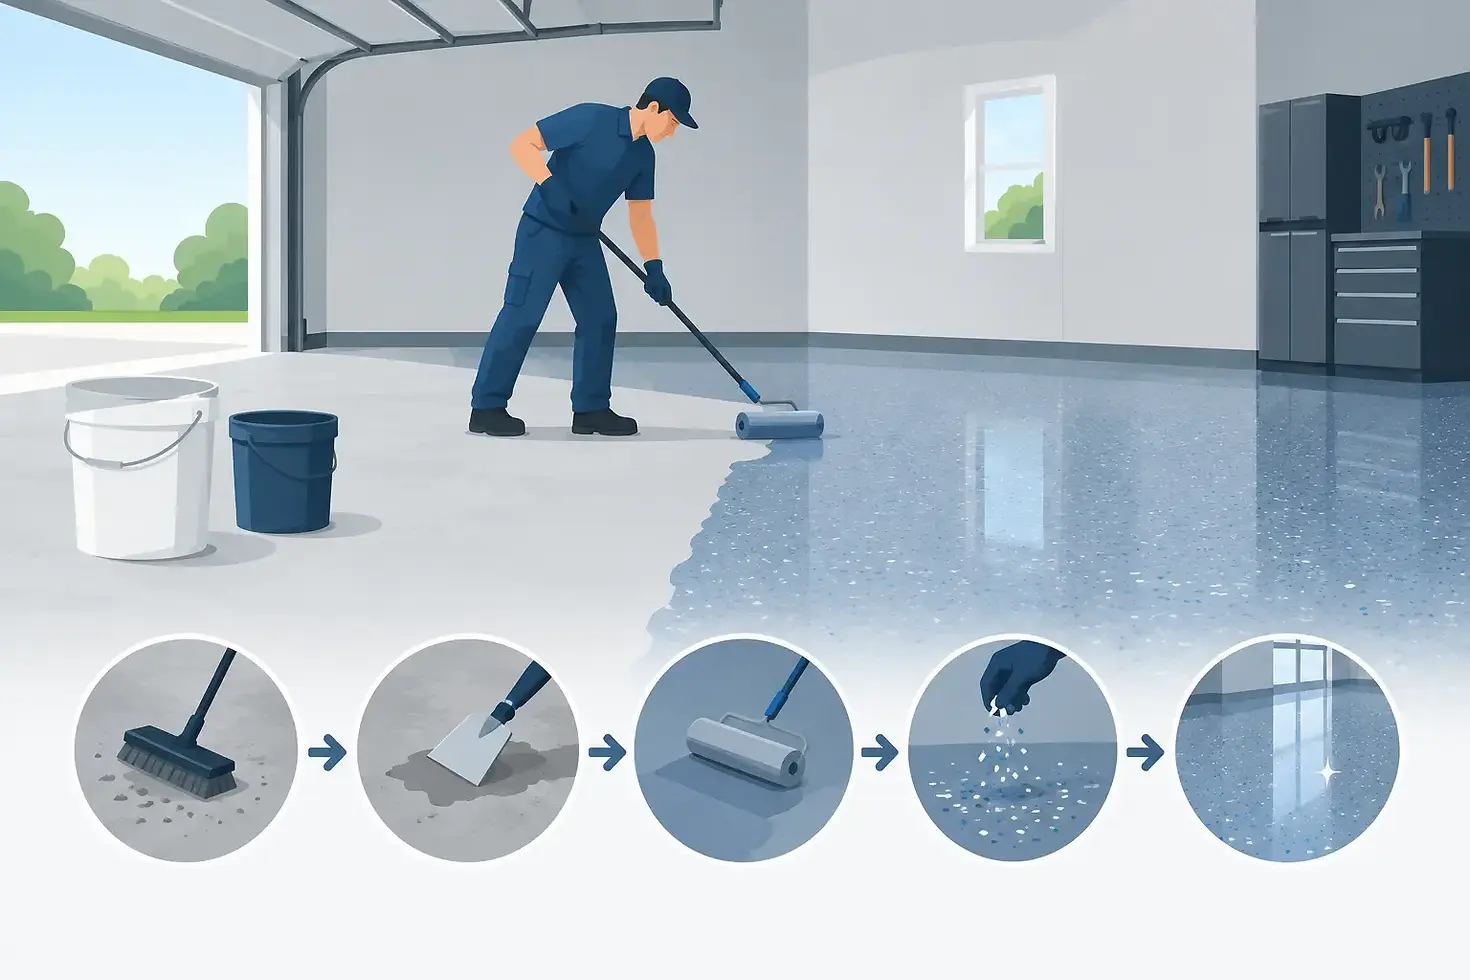
A professionally installed polyaspartic system often follows a same-day sequence: prepare the concrete, repair damaged areas, apply a base coat, add decorative flakes if selected, then finish with a protective clear coat. Each stage is timed around the product's working window and cure rate.
A standard two-car garage may take a full workday, while a larger shop, showroom, patio, or commercial floor can require additional days. Size matters, but condition matters more. A clean, sound slab with no coating on it is generally faster to prepare than a floor with peeling paint, oil saturation, moisture concerns, or extensive cracking.
Before Installation: Site Review and Scheduling
The timeline starts before the crew arrives. A site review helps determine whether the concrete is ready for coating and which finish best fits the space. This is the time to discuss color blends, flake coverage, texture, metallic effects, and how the floor will be used.
For a garage, homeowners may want a decorative flake system that hides dust and complements the home exterior. A business may need a finish that supports frequent foot traffic, equipment, or a specific visual identity. Choosing these details ahead of time keeps installation day focused and efficient.
If the concrete is newly poured, it usually needs to cure before coating. A common guideline is about 28 days, although the actual decision should be based on slab condition and moisture testing. Coating new concrete too soon can trap moisture and compromise adhesion, so this is one part of the schedule that should not be shortened.
The Polyaspartic Floor Coating Installation Timeline, Step by Step
Morning: Clear the Space and Prepare the Concrete
The project begins with access. Vehicles, storage racks, floor mats, and movable belongings should be out of the area before the crew arrives. This saves time and gives installers room to work consistently from edge to edge.
Next comes mechanical surface preparation, often using diamond grinding equipment. This is one of the most important stages in the entire installation. Grinding removes weak surface material, opens the pores of the concrete, and creates the profile needed for the coating to bond properly.
Preparation can reveal issues that were not obvious under years of dust, old paint, or garage clutter. Previous coatings may need more removal. Oil spots may require targeted treatment. A weak or crumbling surface can require additional repair. While these findings can extend the job, addressing them is far better than covering them and hoping for the best.
Midday: Repair Cracks, Joints, and Surface Imperfections
Once the concrete is properly profiled, cracks and chips are repaired with materials selected for the floor's condition. Hairline cracks, larger cracks, spalls, and small pits do not all receive the same treatment. The goal is to create a cleaner, more uniform foundation before the decorative system goes down.
Some movement joints are intentionally left flexible or treated differently from cracks. Concrete naturally moves with temperature changes, and rigidly filling every joint without considering that movement can lead to future issues. This is where experienced installation makes a practical difference.
Repair work is often completed the same day because fast-curing materials are available. But a floor with widespread damage may need additional time. If your slab has significant settlement, moisture intrusion, or active structural cracking, a coating contractor should explain the limitation clearly. A beautiful floor coating cannot solve an underlying concrete or drainage problem.
Afternoon: Base Coat and Decorative Finish
After preparation and repairs, the base coat is applied. Polyaspartic products cure faster than many traditional epoxy systems, which allows crews to work through several layers in a single day. That speed is useful for homeowners who do not want a garage or workspace out of commission for a week.
For a full-broadcast flake floor, decorative polymer flakes are spread across the wet base coat until the surface is fully covered. This creates the familiar textured, multi-tonal appearance many homeowners choose for garages, porches, and work areas. It also offers a more forgiving visual finish than plain gray concrete, especially where dust or everyday marks are common.
Metallic systems and solid-color finishes follow a different application process. They can produce a striking, custom look, but their installation timeline may vary based on the design, layering, and desired movement in the finish. The best choice is not always the fastest one. It is the one that fits how you want the room to look and perform for years.
Late Afternoon: Scrape, Vacuum, and Apply the Clear Coat
With a flake system, excess flakes are scraped and vacuumed after the base layer has set. The crew then applies a clear polyaspartic topcoat to protect the floor, enhance color, and create the final sheen.
The topcoat can be adjusted for the setting. A residential garage may benefit from an added traction component, especially near entry doors or where vehicles bring in rain. A showroom or interior commercial space may prioritize a smoother feel and a particular gloss level. These choices affect appearance and maintenance, so they are worth discussing before installation begins.
When Can You Walk, Move Items, or Drive on the Floor?
Fast cure time is one of polyaspartic coating's biggest advantages, but “fast” does not mean instant. Most floors can handle light foot traffic within several hours, often later the same day or by the next morning depending on the system and conditions. Heavy items should wait longer, and vehicles commonly need about 24 hours before returning to the floor.
Temperature and humidity can change those windows. Mississippi heat, cool snaps, damp conditions, and the temperature of the concrete itself all influence cure behavior. An experienced installer plans around local conditions and gives you specific return-to-service guidance for your floor rather than relying on a generic promise.
Do not drag appliances, toolboxes, metal shelving, or loaded storage cabinets across a newly coated floor. Even after the floor is ready for use, lifting and placing heavy items carefully protects the finish. For the first several days, it is also wise to avoid harsh cleaners and allow the coating to continue reaching its intended performance level.
What Can Extend the Schedule?
Most delays are not caused by the coating itself. They come from conditions that must be corrected to protect the quality of the finished floor. Four common factors are moisture, contamination, prior coatings, and concrete damage.
Moisture is especially important. If moisture vapor is moving through the slab at a level the system cannot tolerate, the solution may involve further testing, a moisture-mitigation approach, or a change in project scope. Similarly, old epoxy, paint, glue, or sealer must be removed thoroughly enough for the new coating to adhere.
Weather can also affect exterior and partially enclosed spaces. Polyaspartic products perform well across a broad range of conditions, but wind-blown debris, rain exposure, extreme surface temperatures, and humidity still require thoughtful scheduling. A patio or covered outdoor area may need more flexibility than an attached garage.
Commercial projects can take longer for practical reasons. Working around customer hours, loading areas, equipment, safety requirements, and phased access often matters as much as square footage. A good plan can keep operations moving while sections of the floor are completed in sequence.
How to Make Installation Day Easier
The simplest way to protect your schedule is to clear the floor completely before the appointment. Decide in advance where vehicles, tools, inventory, and storage items will go while the coating cures. If there are areas of concern, such as a recurring wet spot, a major crack, or a former oil leak, point them out during the initial review.
It also helps to plan around the return-to-service window. If you need your garage for a move, an event, a delivery, or a work vehicle, schedule the installation with a little cushion. A one-day installation is convenient, but an extra day of flexibility makes the experience much less stressful.
Madison Coatings Company approaches every project with that balance in mind: efficient installation, careful preparation, and a finish selected for the way you actually use your space. A quality floor should feel like an upgrade from the first step onto it, not a scheduling headache.
When you are choosing dates, think beyond the day the coating is applied. Give the concrete the preparation it deserves, give the coating time to cure, and plan your return to the space with confidence. That short wait is what helps turn a fast installation into a floor you will be happy to see every time you pull in or open the door.